

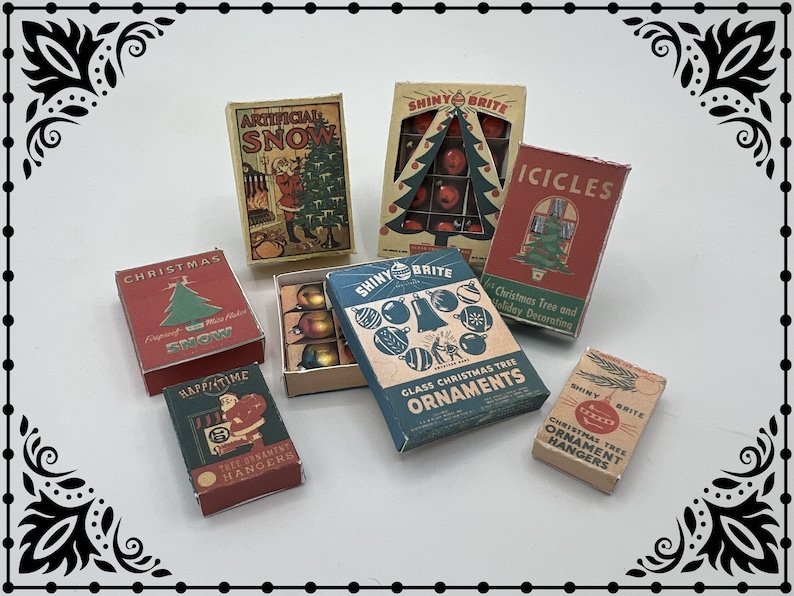
Le palle di Natale di vetro soffiato sono oggetti fragili ed una volta terminate le feste vanno riposte in scatole con divisori, così che le sfere non si tocchino tra di loro e non si possano quindi rompere.
Blown glass Christmas balls are fragile items and once the holidays are over they should be stored in boxes with dividers so that they do not touch each other and thus cannot break.

Un tempo le scatole erano di cartoncino. Ogni pallina veniva appoggiata su della carta velina, così da creare un cuscinetto protettivo attorno a lei e poi sistemata nel suo scomparto.
In the past, the boxes were made of cardboard. Each ball was placed on tissue paper to create a protective cushion around it and then placed in its compartment.

Online esistono diverse scatole per le palle di Natale in miniatura da scaricare ed assemblare. Bellissime sono quelle di Sarah del blog Amber’s house. Ma non sempre si adattano alle dimensioni delle nostre palline. Da qui l’esigenza di creare scatole su misura.
Online there are several boxes for miniature Christmas balls to download and assemble. Beautiful are those by Sarah from the blog Amber’s house. But they do not always fit the size of our balls. Hence the need to create custom-made boxes.

Ho iniziato creando un modello di carta. Su un foglio a quadretti, ho sistemato la pallina ed ho misurato l’ingombro della sfera. Le mie capsule più grandi misurano 1,3 mm di diametro. Ho quindi scelto di lasciare per ogni pallina uno spazio di 1,5 cm x 1,5 cm.
Per ottenere una scatola che non fosse sproporzionatamente enorme per una casa delle bambole in scala 1:12, ho dovuto quindi farne una che contenesse solo 4 palline.
Ho disegnato la sagoma con base 3 cm x 3 cm ed un bordo alto 1 cm. Ho aggiunto su i lati due lembi per la colla. Poi ho tagliato ed assemblato la scatola provvisoria. All’interno ho sistemato i divisori, che impediscono alle palline di venire a contatto e frantumarsi. Infine ho sistemato le capsule all’interno della scatola per verificare che le misure fossero corrette.
To make a custom Christmas box for my baubles, I first created a paper template. On a square sheet I arranged one ball and measured the overall dimension. My larger capsule is 1.3 mm in diameter. So I chose to calculate a space of 1.5 cm x 1.5 cm for each bauble.
In order to get a box that was not too big and out of proportion for a dollhouse in 1:12 scale, I therefore had to make one for only 4 balls.
I drew the template with a 3 cm x 3 cm base and a 1 cm high edge. I added on the sides two glue flaps. Then I cut and assembled a tentative model. Inside I placed the dividers, which prevent the baubles from hitting one against the other and shattering. Finally, I placed the capsules inside the box to make sure the measurements were correct.

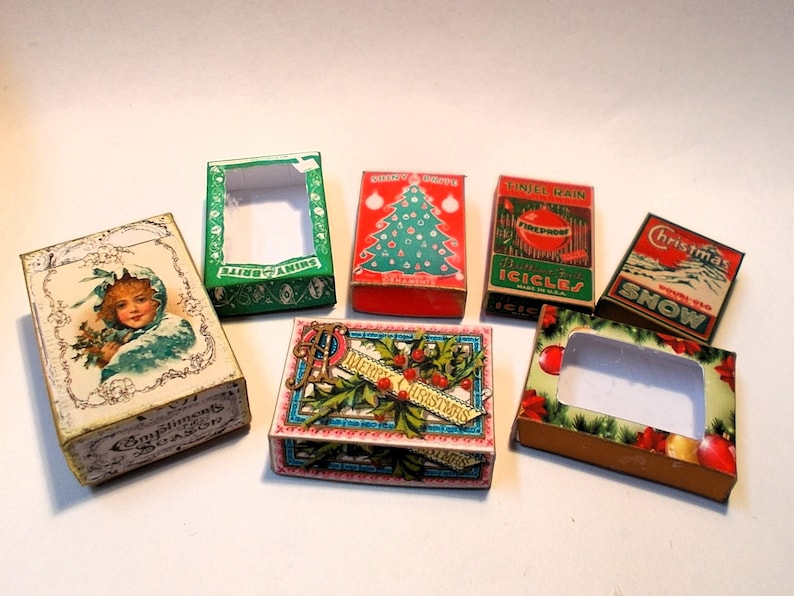
Con il programma grafico open source Gimp ho progettato la sagoma della scatola aperta. Mi sono poi divertita a cercare grafiche e sfondi natalizi vintage per personalizzarle.
Le mie scatoline misurano 3 cm x 3 cm x 1 cm e possono contenere sia 4 che 9 palline, a secondo dei divisori che si scelgono. Infatti ho disegnato sia i due divisori necessari per creare 4 scomparti, che i quattro divisori per realizzare 9 scomparti. Potete scaricare i pdf con le 6 varianti cliccando qui per la parte I e la parte II. Ricordate che sono per un uso esclusivamente personale e non possono essere vendute o distribuite né in formato cartaceo né in formato digitale.
Ho stampato le immagini in alta qualità su un cartoncino, assicurandomi che nelle impostazioni di stampa della stampante il ridimensionamento fosse al 100% e che non fosse spuntata la voce “adatta e centra”. Questo accorgimento è importante se si vuole ottenere delle immagini stampate che abbiano le dimensioni stabilite in fase di progetto.
Using Gimp, an open source software, I drew the box template. I then had a lot of fun looking for vintage Christmas graphics and backgrounds to customize them.
My boxes measure 3 cm x 3 cm x 1 cm and can contain either 4 or 9 balls, depending on the dividers I choose. In fact, I designed both: two dividers to create 4 compartments and four dividers to make 9 compartments. You can download the pdf with the 6 patterns by clicking here for part I and part II. Remember that these are for personal use only and cannot be sold or distributed in either paper or digital format.
I printed the images in high quality on cardboard, making sure that the options in my printer’s settings were as follows: “print at 100%” or “print actual size” was checked and “fit and center” or “fit fo page” was unchecked. This is important if you want to get a print true to size,


Nel modello che ho scelto di fare, coperchio e scatola sono collegati. Sono un unico pezzo.
The model I chose to make is a one piece box. Lid and box are connected.

Due delle sei varianti hanno una finestra nel coperchio per permettere di vedere l’interno. Qui di seguito vi racconto come ho realizzato la scatola, quella con i bambini alla finestra, perché è quella più elaborata. A parte la creazione della finestra, il resto della lavorazione è uguale per tutte e sei.
Two of the six variants have a clear lid to allow to see inside. Below I tell you how I made the box, the one with the children at the window, because it is a bit more elaborate. Apart from creating the window, the rest of the processing is the same for all six.

Con riga di metallo e cutter ho tagliato lungo le linee più lunghe. È importante tenere la parte con la stampa sotto il righello, così da proteggerla in fase di taglio. La riga va posizionata esattamente sulla linea da tagliare. Infatti la lama del cutter non ha quasi spessore ed una volta appoggiata al righello, taglierà con precisione lungo l’asta di metallo.
Using a metal ruler and a utility knife, I cut along the longer lines. It is important to hold the printed side under the ruler so that it is protected when cutting. The ruler should be placed exactly on the line to be cut. Since the blade of the cutter has almost no thickness, once it rests against the ruler, it will cut precisely along the metal rod.

Per ritagliare intorno alle alette che serviranno per la colla ho usato una forbice. Invece per aprire la finestrella ho usato il righello ed il cutter per i tre lati diritti, mentre per le figurine ho tagliato con il bisturi a mano libera.
To cut out around the glue flaps, I used scissors. To open the window I used a ruler and a utility knife for the three straight sides and to cut out around the figurines I used a freehand scalpel.

Prima di staccare l’interno della finestrella dal bordo circostante, ho girato il cartoncino ed ho controllato che la lama avesse trapassato il cartoncino in ogni parte e che il taglio fosse continuo. Se anche solo una piccola parte fosse rimasta collegata al bordo, questa avrebbe strappato il margine, rovinandolo.
Before detaching the inside of the window from the surrounding edges, I turned the cardboard over and checked that the blade had pierced the cardboard in every part and that the cut was continuous. If even a small part was left connected to the edge, it would have torn the margin, ruining it.

Aiutandomi con una lama diritta, come avevo già fatto per le scatole della cucina, ho piegato ogni lembo e bordo. Il cartoncino tende a piegarsi in modo non preciso, pertanto prima di curvarlo l’ho premuto ben bene conto la lama, imprimendo la linea di piegatura. Attenzione a non usare coltelli affilati, altrimenti si rischia di tagliarsi.
Con la colla stick ho incollato i lembi all’interno dei bordi. È importante usare una colla che non lasci residui visibili, perché altrimenti l’interno risulterebbe macchiato e disordinato.
With the help of a straight blade I folded each flap and edge, as I did for the grocery boxes. Cardstock tends to fold inaccurately, so before bending it I pressed it well against the blade, imprinting the fold line. Be careful not to use a sharp knife, otherwise you risk cutting yourself.
Using glue stick, I glued the flaps to the inside of the edges. It is important to use a glue that leaves no visible residue, otherwise the inside would turned out stained and messy.

Ho tenuto premute le parti appena incollate per dare tempo alla colla di fare presa. All’interno della scatola ho usato l’estremità di un pennello per schiacciare ben bene i lembi a contro i bordi. Altrimenti il mio dito, essendo piuttosto grande rispetto alla scatola, avrebbe appiattito l’angolo.
Ho tenuto i bordi della scatolina in posizione con un elastico ed ho lasciato asciugare la colla.
I pressed the freshly glued parts together to give the glue time to set. To flatten the flaps inside the box against the edges, I used the end of a paintbrush. Otherwise my finger, being rather large compared to the box, would have flattened the corner.
I held the edges of the little box in place with a rubber band and let the glue dry.

Nella mia raccolta di materiale riciclato ci sono gli imballaggi di plastica trasparente. Da una vaschetta per alimenti ho ricavato il pvc per la finestrella nel coperchio della scatola delle palle di Natale. Ho tagliato un quadrato leggermente più piccolo, di 2,8 cm 2,8 cm.
In my collection of recycled materials I have also a variety of clear plastic packaging. From a food container I obtained the pvc for the small window in the lid of the Christmas baubles box. I cut a slightly smaller piece. The square measures 2.8 cm 2.8 cm.

Ho incollato la plastica sul retro del coperchio facendo attenzione a non far sbavare la colla sulla parte della plastica visibile all’interno della finestra. Per unire questi materiali ho usato il Super Attak Power Gel.
I glued the plastic to the back of the lid being careful not to smudge the adhesive on the plastic that is visible inside the window. For these materials I used Super Attak Power Gel.

Un elemento che non può mancare nelle scatole che contengono le palline di vetro sono i divisori. Io li ho ricavati dallo stesso cartoncino della scatola.
Dividers are an essential part of a box for storing glass baubles. I made mine from the same cardboard as the box.

Il divisorio per 4 palline è composto da due rettangoli di cartoncino grandi uguali che si incastrano al centro. Ognuno è lungo quanto la base della scatola e largo poco meno dell’altezza del bordo. Ogni divisorio per la mia scatola misura quindi 3 cm x 0,8 cm.
Essi hanno un taglio perpendicolare, a metà della lunghezza, che permette d’infilarli uno nell’altro. Il taglietto è largo tanto quanto lo spessore del cartoncino e lungo solo fino a metà della larghezza. Pertanto nel mio caso è lungo 0,4 cm. Nel pdf che ho preparato il taglietto è disegnato con uno spessore di 1 mm, nel caso vogliate fare i divisori con un cartoncino più sostenuto.
Infilando un rettangolo dentro l’altro nel punto dei tagli, essi si incastrano formando una croce.
Per ritagliare il taglietto vi è un punto difficile da raggiungere, ovvero il lato corto al centro del rettangolo. Io ho appoggiato la punta del bisturi nel punto da tagliare e l’ho fatta affondare nella carta fino a che la lama ha reciso la strisciolina.
The divider for 4 balls consists of two equal-sized rectangles of cardboard that fit together in the center. Each is as long as the base of the box and a little less than the height of the edge. Each divider for my box therefore measures 3 cm x 0.8 cm.
They have a perpendicular slot in the middle of the length, which allows them to be inserted into each other. The cut-out is as wide as the thickness of the card and only as long as half the width. In my case it is 0.4 cm long. The slot in my pdf is 1 mm wide, so that you can also use a thicker cardboard for the dividers..
By tucking one rectangle inside the other where the slots are, they interlock and form a cross.
To cut out the slot, there is a spot that is very hard to reach. It is the short side in the center of the rectangle. So I placed the tip of the scalpel exactly on that spot and let it sink into the paper until the blade severed the strip.

Per realizzare i divisori per 9 palline, ho tagliato 4 rettangoli da 3 cm x 0,8 cm. In questo caso i taglietti perpendicolari sono 2 su ogni rettangolo e sono a 1 cm di distanza dal bordo. Anche questi sono lunghi solo 0,4 cm e si incastrano gli uni negli altri, creando 9 spazi da 1 cm x 1 cm l’uno.
Sia i divisori da 4 che quelli da 9 palline sono scaricabili insieme alle sagome delle scatole.
To make the dividers for 9 balls, I cut 4 rectangles 3 cm x 0.8 cm. In this case there are 2 perpendicular slots on each rectangle and they are 1 cm away from the edges. These are also only 0.4 cm long and fit into each other, creating 9 spaces of 1 cm x 1 cm each.
Both the 4- and 9-ball dividers are downloadable along with the box templates.

Una volta incastrati i rettangoli gli uni negli altri, li ho tenuti fermi con un puntino di colla Tacky glue, che è più densa della normale colla vinilica e non sgocciola via.
Naturalmente i divisori da 9 vanno bene per palline di diametri più piccoli, come ad esempio le piccole sfere che vedete nella foto e che fanno parte di una ghirlanda di Natale.
Infine ho inserito i divisori nella scatola e li ho fissati sul fondo con un goccio di colla.
Once the rectangles were stuck into each other, I held them in place with a dab of Tacky glue, which is thicker than regular vinyl glue and does not drip off.
Of course, 9 compartments dividers are fine for smaller baubles, such as the small balls you see in the photo that are part of a Christmas wreath.
Finally I inserted the divider into the box and fixed it to the bottom with a dab of vinyl glue.

Per tenere le palline ferme nella scatola occorre anche della carta velina. Così ho ritagliato dei quadrati (circa 1,5 cm x 1,5 cm), uno per ogni scomparto. Li ho poi appallottolati per stropicciarli ben bene e rendere la carta meno rigida.
Tissue paper is also needed to hold the balls firmly in the box. So I cut out squares (approx. 1.5 cm x 1.5 cm), one for each compartment. I then rolled them up to crumple them well and make the paper less stiff.

Usando una punta tonda e sistemando la carta su un piano morbido ho impresso la forma rotonda della pallina.
Using a round tip and laying the paper on a soft surface, I embossed the round shape of the ball.

Aiutandomi con la parte finale del manico di un pennello che aveva suppergiù le dimensione della pallina, ho sporcato il lato esterno della carta con la colla stick e poi l’ho fatta aderire al fondo della scatola, al centro dello scomparto. Questo lavoro l’ho fatto lasciando l’elastico attorno alla scatola, così che eventuali pressioni sui bordi non facessero “saltare” le pari incollate.
With the help of the handle of a brush that was about the size of the ball, I smeared the outside of the paper with glue stick and then stuck it to the bottom of the box, in the center of the compartment. During this step I left the elastic around the box, so that any pressure on the edges would not make the glued parts come apart.

Ed ecco come si vedono le palle di Natale attraverso la finestra del coperchio.
And here is how the Christmas balls look through the lid window.

A mio parere la scatola verde con la finestrella più piccola si adatta meglio a contenere solo 4 palle, perché l’apertura non lascia vedere molto dell’interno, ma voi potete abbinare i divisori alle scatole che volete.
In my opinion the green box with the smaller window is better suited to hold only 4 baubles, because the opening does not not show much of the inside, but you can use the dividers you want with the boxes of your choice.


Nel mio pdf ci sono 6 modelli di carte differenti. Alcune stampe possono essere arricchite con dettagli sbrilluccicosi. Ho aggiunto ad esempio alla scatola con la stampa “candele” un tocco più festoso ricalcando con un pennarello metallizzato i raggi di luce.
There are 6 different paper patterns in my pdf. Some prints can be embellished with glittery details. For example, I added a more festive touch to the box with the “candle print” by tracing the rays of light with a metallic marker.


Naturalmente le scatole possono essere stampate anche su normale carta da stampante. Risulteranno più leggere, ma in compenso le pieghe saranno più precise e nitide. In questo caso per i divisori è meglio usare la carta doppia, così da ottenere una maggiore consistenza.
Of course, the boxes can also be printed on regular printer paper. They will turn out lighter, but in return the folds will be more precise and crisp. In this case it is better to use double paper for the dividers, so they will be more sturdy.

Spero che le mie scatoline vi siano piaciute e nel caso doveste utilizzare le mie printies, mi farebbe molto piacere vedere una foto.
I hope you enjoyed my little boxes and in case you should use my printies, I would be very pleased to see a photo.
Come sempre, al termine del post, ho raccolto un paio di link nel caso vogliate acquistare delle scatole per palle di Natale realizzati da altri miniaturisti.
As always, at the end of the post, I have collected a couple of links in case you would like to purchase Christmas ball boxes made by other miniaturists.

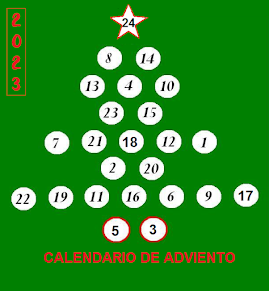
Questo progetto è abbinato al calendario dell’Avvento francese Calendrier de l’Avent 2023, che Joc organizza ormai dal 2008.
Per me questa è la 10 volta che partecipo. Voglio quindi ringraziarla di cuore per avermi coinvolta tutti questi anni.
Vi invito quindi ad andare a scoprire cosa si nasconde dietro alle prossime porticine del calendario di Joc e non dimenticate il Calendario de Adviento 2023 organizzato da Matxalen.
Nella speranza di rivedervi prima del prossimo Avvento, auguro a tutti un sereno Natale ed un felice anno nuovo!
This project is linked with the French Advent calendar Calendrier de l’Avent 2023, which Joc has been organizing now since 2008.
For me, this is my 10th time that I am taking part. So I want to thank her from the bottom of my heart for involving me all these years.
I invite you to go and find out what is hidden behind the upcoming doors in Joc’s calendar and don’t forget the Spanish Calendario de Adviento 2023 organized by Matxalen.
Hoping to see you again before the next Advent, I wish everyone a peaceful Christmas and a happy New Year!


Las cajas son preciosas y el tutorial muy bien explicado,muchas gracias!
Feliz Navidad y que tengas un año estupendo!
Besos.
"Mi piace"Piace a 1 persona
Grazie!! Tanti auguri anche a te 🎅🏻🎄🎅🏻
"Mi piace""Mi piace"
Great tips – Happy New Year!
"Mi piace"Piace a 1 persona
Sono Maria Chiara, ci siamo conosciute a Trieste e sono subito passata a leggere il tuo affascinante blog: complimenti soprattutto per la tua pazienza. Un caro saluto
"Mi piace"Piace a 1 persona
Ma grazie!! ☺️
"Mi piace""Mi piace"